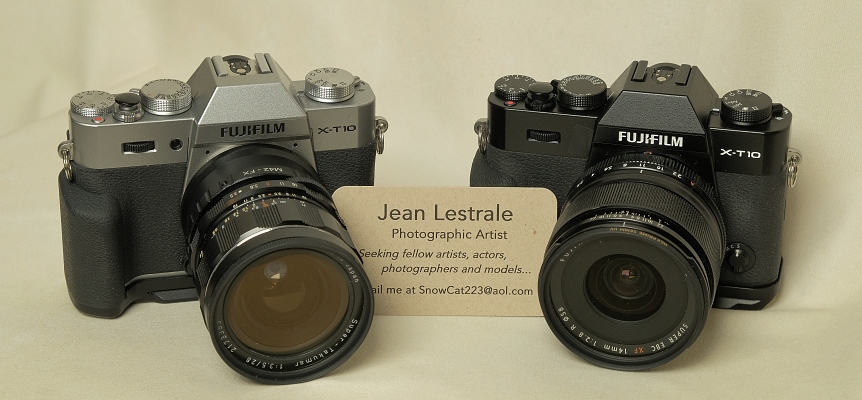
The Fuji X-T10 and X-T20 cameras
by Jean Lestrale
Congradulations on purchasing one of the finest digital cameras
ever made. These cameras feature very high quality construction
and produce fantastic images. They have become quite collectable,
and continue to rise in value on the used market, due mainly to
the fact that the earlier X-Trans sensors have the best color
rendering. Unfortunately these cameras can also be very difficult
to set up and calibrate, which is why I created this guide. It
will save you a lot of time and trouble.
Before you begin, please be sure to enter all the menu settings as shown below. These menu settings will allow the camera to be operated in the most simple convenient way possible. All of the common functions can be adjusted using external controls rather than menus, and all unnecessary features have been disabled to prevent accidental activation.
Unfortunately, a few of the less common functions still require using the menu system, so I assigned "shortcuts" for them to the rear D-ring buttons. The upper D-ring button brings up the film speed menu, while the left button brings up the white balance menu, and the lower button brings up the timer.
There are more buttons you can assign to shortcuts if you wish, however I recommend that you don't change the color calibration settings until you've had time to try them. Getting the color to be perfectly accurate and balanced is a complex chore, and these settings have been very carefully developed and tested, and have proven to work well.
After the camera functions have been explained, sections 16-21 provide some general photographic advice, and the remainder is devoted to the flash units and other accessories that I use.
Contents
Camera:
1. X-T10 menu settings
2. X-T20 menu settings
3. Cables and connectors
4. Firmware updates
5. Re-setting the image counter
6. Display modes
7. The shutter button
8. Focusing
9. The aperture
10. The exposure
11. The drive dial
12. Basic image settings
13. Film simulations
14. White-balance and color shifts
15. Image completion
General:
16. Lens selection
17. Using filters
18. Using flash
19. Printing
20. Photographic styles
21. Practical tips
Accessories:
22. The Godox X1T flash trigger
23. The Godox TT350 speedlight
24. The Godox TT600 speedlight
25. The Promaster 100SL speedlight
26. The Godox SK300 studio flash
27. The Godox SL60 studio LED lamp
28. The Hahnel Captur shutter release
Section 1: X-T10 menu settings
Camera menu 1:
PSAM status line (for information only)
Autofocus settings:
Focus area: as desired (large/in
center)
AF mode: single point
Release/Focus prio: release (same
for both)
Instant AF setting: AF-S (w/manual
focus)
AF+MF: off
Face detection: off
Eye detection: off
Pre-AF: off
AF illuminator: off
ISO: as req'd
Image size: L, 3:2
Image quality: Fine
Dynamic Range: 100%
Film Simulation: Pro-Neg-Std
Camera menu 2:
Self timer: off
Interval timer: not used
White-balance: 5600K or A/R (WB-shift: -2 Red, -1
Blue)
Color: -1
Sharpness: +1
Highlight tone: -1
Shadow tone: -2
Camera menu 3:
Noise reduction: 0
Long Exposure noise reduction: on (works in T or
B mode)
Lens Modulation Optimizer: off (at f/16 only)
Select custom setting: not used
Edit custom setting: not used
Mount Adaptor setting: not used
Shoot without lens: off
Camera menu 4:
MF Assist: standard (turn off "focus peaking"
options)
AE/AF lock mode: on/off switch
AF lock mode: AF lock only
Photometry: multi
Interlock Spot AE & focus area: off (works w/Spot
photometry)
Flash setup:
Flash mode: forced flash
Flash compensation: 0 (or A/R)
Red-eye removal: off
Movie setup:
Movie mode: 1920x1080/24fps
Movie ISO: 2500
Mic level adj: 4
Mic/Remote release: remote (after
changing this, must turn pwr off/on)
Camera menu 5:
BKT/Adv. settings:
BKT1: ISO (+/- 1)
BKT2: Film type (Pro-Neg-Standard,
Chrome, Mono-R)
IS Mode: shooting only (for lenses w/OIS)
Wireless communication: not used (for smart
phones)
Aperture setting: not used (for Fuji lenses without
aperture ring)
Shutter type: M (mechanical)
Set-Up menu 1:
Date/Time: as req'd
Time reference: home
Language: English
Reset: use if req'd
Sound & flash off: off
Sound setup:
Operation vol: off
Shutter vol: low (for electronic
shutter)
Shutter sound: sound 1 (for
electronic shutter)
Playback vol: 9
Screen setup:
Image disp: off ("instant
playback")
EVF autorotate disp: on (rotates
display info)
Preview exp. in man mode: on (or
off w/flash)
EVF brightness: Manual: 0
EVF color: 0 (med)
LCD brightness: 0 (med)
LCD color: 0 (med)
Preview pic. effect: on (always
simulate film & WB)
Frame guideline: Grid 9
Autorotate PB: off (during playback
only)
Focus check: on (auto-zoom w/manual
focus)
Focus scale units: feet
Disp. custom settings: (press Disp/Back to
hide)
Focus frame
Aper/S-Spd/ISO
Exp. comp.
Focus mode
Continuous mode
Battery level
Set-Up menu 2:
Button/Dial settings: (hold Disp/Back to set)
Function settings:
Fn1 (top red): none
Fn2 (ft dial): none
Fn3 (upper D): film speed
Fn4 (left D): white bal
Fn5 (right D): none
Fn6 (lower D): timer
Fn7 (lower rear): none
Selector button setting: Fn (for
D-ring)
Edit/Save Quick Menu: all "none"
(hold Q button to set)
Command dial setting: SS-F (put
SS in front, F in rear)
AE-L/AF-L buttons: AE-L/AF-L (normal
button positions)
Focus ring: CW (CW = farther out)
Power management:
Auto power off: 5 min.
High performance: on ("no-sleep"
power mode)
Sensor cleaning:
OK: not used
When switched on: off
When switched off: off
Save Data setup:
Frame #: continuous
Save org. image: off (w/red-eye
removal)
Edit file name (sRGB): as desired
(sets first 4 char of file-name prefix)
Color space: sRGB
Connection setting: not used (for wi-fi networks)
Set-Up menu 3:
Format: use if req'd (to re-set frame #'s)
Section 2: X-T20 menu settings
The X-T20 is physically identical to the X-T10 with just a few
minor differences. The assignable button on the lower rear body
is gone, and a video position has been added to the drive dial.
There are a few other operational differences. The light meter became a numeric read-out, instead of the more helpful sliding scale, and the AE-L and AF-L buttons can now be re-assigned to other functions if desired.
Fuji also decided to revise the menus on the X-T20, so although most of the settings remain the same as on the X-T10, they are arranged differently. Some of the settings became more complex due to wireless, touch-screen, and video features being added, however those features are optional and can easily be disabled.
Finally, the way the X-T20 interfaces with the monitor connected to the HDMI port has changed. With the X-T10, no video signal is sent until you press playback, whereas on the X-T20 a live video feed is sent all the time you're in the shooting mode. (This can be disabled using the viewfinder display button.)
Menu 1, IQ:
Image size: L, 3:2
Image quality: Fine
RAW recording: uncompressed
Film Simulation: Pro-Neg-Std
Grain effect: off
Dynamic Range: 100%
White-balance: 5600K or A/R (WB-shift -3 Red,
-2 Blue)
Highlight tone: -1
Shadow tone: -2
Color: -1
Sharpness: +1
Noise reduction: 0
Long Exposure noise reduction: on (works in T or
B mode)
Lens Modulation Optimizer: off (works at f/16
only)
Color space: sRGB
Pixel mapping: use if req'd
Select custom setting: not used
Edit custom setting: not used
Menu 2, AF/MF:
Focus area: as desired (large/in center)
AF mode: Single Point
AF-C custom settings: 1
AF point display: off (zone/wide modes only)
Number of focus points: 325
Pre-AF: off
AF illuminator: off
Face/eye detection: off
AF+MF: off
MF assist: Standard (turns off "focus peaking"
options)
Focus check: on (auto-zoom w/manual focus)
Interlock Spot AE & focus area: off (w/Spot
photometry)
Instant AF setting: AF-S (w/manual focus)
Depth of field scale: pixel
Release/Focus prio: release (same for both)
Touch screen mode: off
Menu 3, Shooting:
Drive settings:
BKT1: ISO (+/- 1)
BKT2: Film type (Pro-Neg-Standard,
Chrome, Mono-R)
Self Timer - off
Interval timer - not used
Photometry - Multi
Shutter type - MS (mechanical)
IS mode - shooting only (for lenses w/OIS)
ISO - as req'd
Mount Adaptor setting - not used
Wireless communication - not used (for smart
phones)
Menu 4, Flash:
Flash function setting:
If flash is raised, synch mode menu for
flash will appear. Set to M (manual), and synch mode to 1st
curtain.
If flash not raised, synch mode menu for
hot shoe will appear. Set to M (manual) and synch mode to
1st curtain.
Red-eye removal: off
TTL-lock mode: last flash
Menu 5, Movie:
Movie mode: 2160/24P
Movie AF mode: Area
HDMI output info display: off
4K movie output: card
HDMI record control: off
Mic level adj: 4
Mic/Remote release: remote (after changing this,
must turn pwr off/on)
Menu 6, Set up:
User setting:
Format: use if req'd (can re-set
frame #'s)
Date/Time: as req'd
Time difference: home
Language: English
My menu setting: not used
Sensor cleaning:
OK: use if req'd
When switched on: off
When switched off: off
Sound & flash: on
Reset: use if req'd
Sound set-up:
AF beep vol: off
Self-timer beep vol: off
Operational vol: off
Shutter vol: low (for
electronic shutter)
Shutter Sound: sound 1 (for
electronic shutter)
Playback Vol: 9
Screen set-up:
EVF brightness: Manual: 0
EVF color: 0 (med)
LCD brightness: 0 (med)
LCD color: 0 (med)
Image disp: off ("instant
playback")
EVF autorotate disp.: on (rotates
display info)
Preview EXP/WB in man mode: on (or
WB ONLY w/flash)
Preview pic. effect: on (always
simulate film & WB)
Frame guideline: Grid 9
Autorotate PB: off (during playback
only)
Focus Scale units: feet
Disp. custom settings: (press Disp/Back
to hide)
Focus frame
Aper/S-Spd/ISO
Exp. comp. (digital)
Focus mode
Continuous mode
Battery level
Large indicators (EVF): off
Large indicators (LCD): off
Large indicators disp.: not used
Button/Dial settings: (hold Disp/Back to set)
Edit/save Quick Menu: not used
Fn/A-EL/AF-L button setting:
Fn1 (top button): none
Fn2 (upper D): film speed
Fn3 (left D): white bal
Fn4 (right D): none
Fn5 (lower D): timer
AE-L button: Preview
EXP/WB
AF-L button: AF-L only
Rear command dial (push):
none
Selector button setting: Fn (for
D-ring)
Command dial setting: SS-F (puts SS in
front, F in rear)
Shutter AF: on
Shutter AE: on
Shoot without lens: off
Focus ring: CW (CW = farther out)
AE/AF lock mode: S
Aperture setting: not used (for Fuji
lenses without aperture ring)
Touch screen setting:
Touch screen: off
EVF touch screen area: off
Power management:
Auto power off: 5 min.
Performance: high performance ("no-sleep"
power mode)
Save Data setup:
Frame #: cont.
Save org. image: off (w/red-eye removal)
Edit file name (sRGB): Z000 (set file-name
prefix)
Copyright info: not used
Connection setting:
Wireless settings: not used
PC auto save setting: not used
Geotagging set-up: not used
Instax printer connection: not used
PC connection mode: USB card
Section 3: Cables and connectors
There are 3 connectors on the side of the cameras.
The top one is a 2.5mm stereo (3-conductor) jack, into which you can plug either a microphone or a remote shutter release. The function of this shared "mic/remote" jack can be selected in camera menu 4, Movie Setup on the X-T10... or in menu 5 on the X-T20. Note that in order for a change to take effect you must turn the power off then back on again.
If you wish to use a mono microphone to drive both channels, you can use a simple "mono to stereo" adapter.
The middle connector is an HDMI output, which requires a Micro-D HDMI connector. The other end can go to any monitor's HDMI input, which usually accepts a standard "type A" HDMI connector. This provides an easy way to view images immediately, however the HDMI output is not the same thing as an actual JPG image... so although the HDMI output is reasonably sharp, the color is not true "8-bit" and is not perfectly accurate.
The lower connector is a USB port, which can be used to download images to a computer. It requires a Micro-B USB connector. Note that this port cannot be used to transfer Fuji firmware updates.
Section 4: Firmware updates
The firmware version currently loaded in a camera or a lens can
be checked by holding down the Disp/Back button while turning on
the camera.
The cameras and lenses that I use have been discontinued, and no longer receive updates. The final firmware versions for them are as follows:
X-T10: ver. 1.31
X-T20: ver. 2.10
XF 18-55: ver. 3.24
XF 14: ver. 3.10
To check for new updates for Fuji cameras or lenses, you must visit the Fuji download website.
To perform an update you need to have an SD card drive on your computer. Once an update file has been downloaded, take the SD card out of your camera and insert it into the computer, then copy the file to the SD card, and return it to the camera.
To begin the update simply hold down the Disp/Back button while turning on the camera, then follow the prompts.
Section 5: Re-setting the image counter
The maximum image number is 9999, so the counter must be manually
re-set before that number is reached (or whenever desired).
1. In Set-Up menu 2, Save Data Setup: change Frame # from "Continuous" to "Renew"
2. In Set-Up menu 3: Format the memory card
3. Take a shot
4. Return Frame # back to "Continuous"
Section 6: Display modes
In order to correct for variations in eyesight, the viewfinder
may be focused using the small wheel, located just to the left
of the eyepiece.
Pressing the View button, located to the right of the eyepiece, allows you to cycle through a series of display options. There are 4 options in the Shooting mode, but only 3 in the Playback mode.
In Shooting mode:
I prefer "power-saver mode", because there may be long periods when the camera is powered up and the viewfinder is not being used. On the other hand, if I need to use the rear screen for shooting, I switch to the "LCD only" mode.
For playback, I prefer "switch-mode", as it allows me to view images either way, depending on where I wish to look.
Section 7: The shutter button
Half-pressing the shutter button performs 3 functions:
Section 8: Focusing
It's very important to have the focus correct at the moment the
shot is taken, as poor focus can't be corrected later by editing.
Fuji lenses have a very good auto-focus system, that's fast and
accurate... I use it most of the time.
The small switch on the front of the camera body allows you to select single or continuous auto-focus mode, or the manual mode. The single mode is used for still photography, and only focuses when the shutter button is pressed half way. For video use, the continuous focus mode tracks the subject, and in the manual mode focus is controlled exclusively by the focus ring on the lens.
The focus box seen in the viewfinder defines the area that the auto-focus mechanism will scan. It's size and location can be varied, however I recommend leaving it set to the largest size. When the shutter button is half-pressed and the focus locks on a subject, the focus box will turn green, indicating the camera is ready to shoot.
If the subject doesn't fall within the focus box, there are two options. To do a series of similar shots, such as portraits in a studio, you could change the location of the focus box... or for more casual shooting you can just half-press the shutter button to lock the focus on the subject, then re-compose slightly and shoot. Provided the lighting doesn't vary too much, the shutter speed and resulting exposure should be fine.
If there's too much of a lighting difference, you can lock the auto-focus by pressing the AF-L button, while leaving the auto- exposure free to operate normally. There is however a minor bug with this function; the auto-focus lock gets released after you take the shot, but the icon in the viewfinder doesn't go away until you either press AF-L again or turn off the camera.
Fortunately I don't use the AF-L function. Switching to manual focus is a far better solution, when you need to take positive control of your focus point.
The manual focusing function is simple and easy to use. Just flip the focus switch to the M position, and the focus can be adjusted directly by the focus ring on the lens. As you begin to turn the focus ring, the display changes into a magnified view, to aid in precise focusing. There are two magnification levels, which can be selected by rotating the rear command dial. After focusing is complete, just half-press the shutter button to go back to the normal unmagnified view.
On the X-T10 you can also zoom in for more precise focusing by simply pressing the rear command dial. This function is essential when working with vintage lenses that do not have an electrical connection to the camera... unfortunately it is not available on the X-T20.
Finally, the AF-L button also works differently in manual mode. Pressing it still causes the lens to auto-focus on whatever is in the focus box, but it doesn't "lock" on it. This gives us a quick way to get the lens close to the desired focus point, so we can manually fine-tune it a bit, before we shoot.
Section 9: The aperture
Changing the aperture typically varies the depth of field, and
therefore the sharpness of the background (bokeh). In certain
other cases it may be necessary to use it to simply adjust the
light level coming through the lens.
To check the depth of field in any given situation, half-press the shutter button to lock focus on your subject, and then note the sharpness of items in the background. As the aperture ring is turned, the changing depth of field can be clearly observed in the viewfinder.
Aperture isn't the only thing which determines depth of field. The distance at which the lens is focused also has a signficant impact. Focusing closely always produces considerable background blur, whereas focusing at longer distances will produce a sharp background regardless of the aperture setting. That being said, most typical shots are taken at an intermediate distance, where the aperture setting does have a noticeable effect on the depth of field, so it can be a very important consideration.
Naturally most photographers prefer to set their own apertures, and the aperture ring found on most lenses makes this very quick and easy. Adjusting the aperture is one of the most common things anyone needs to do, so I would never purchase a lens that didn't have an aperture ring.
Section 10: The exposure
Unlike focus, getting the right exposure requires more effort,
because it depends on the combination of three things; aperture,
shutter speed and film speed (ISO). Balancing these factors can
be complicated, and may involve compromises, so it's important
to understand how they relate to each other.
Let's consider film speed (ISO) first.
On digital cameras, the microprocessor requires a solid signal from the sensor in order to produce a noise-free image. As we know, only the aperture and shutter speed actually affect the amount of light reaching the sensor, while the film speed just varies the gain of the amplifier, which is located between the sensor and the microprocessor. If we crank up the gain of the amplifier to give us enough drive to satisfy the processor in low light, the noise in the signal will be amplified as well.
In testing, the base film speed of ISO 200, and also 400 ISO, were very clean... but as we go higher noise begins to appear. Therefore I usually set my film speed to ISO 400. This provides a small amount of gain without any sacrifice of image quality.
As I mentioned, I usually set the aperture myself. This leaves shutter speed, as the only remaining factor which I will allow the automatic exposure system to control, if I set the shutter speed knob to the "A" (automatic) position. This works fine in casual shooting, in normal lighting situations, as long as the speeds that it selects remain high enough to prevent "camera shake".
The automatically calculated shutter speed (and readings given by the light-meter) are based on a photometry algorithm, which has 3 selectable modes:
We can make slight adjustments to the automatically calculated shutter speed using the Exposure Compensation dial. The meter in the viewfinder indicates the level of compensation, and the display will brighten or dim as it's adjusted, to simulate the exposure.
In order to make greater changes to the exposure we can move the shutter speed knob out of the "A" position and adjust it as desired. In that case, the compensation dial is disabled, and the compensation meter in the viewfinder becomes the light meter.
The shutter speed knob goes from the maximum camera speed of 1/4000 sec. down to 1 second, and fine adjustments can be made using the front cmd dial. If we go beyond the 1 second setting, the shutter speed knob then reaches the "T" (time) mode. In that mode, you can use the front cmd dial to select a shutter speed up to 30 seconds.
The last position on the shutter speed knob is the "B" (bulb) mode. In this mode the shutter simply stays open for as long as you continue to hold down the shutter button... or you can do the same thing using a wireless shutter release.
There are several situations where it's necessary to take manual control of the shutter speed... such as freezing motion, creating motion blur, or for long exposures. In addition, to use the flash we are required to manually set the shutter speed to 1/180 sec. (or less) for proper synchronization.
When in the manual shutter speed mode there is a menu option which allows us to decide whether we wish to see an "exposure simulation", like we see when adjusting the compensation dial in the automatic mode. This is normally very useful, but needs to be disabled when using a flash in low light, to prevent the viewfinder from getting overly dark. The menu option is called "Preview exposure in manual mode". On an X-T10 it can be found in Set-up menu 1, Screen Set-up (set to OFF), while on an X-T20 it's in Menu 6, Screen Set-up (set to WB ONLY).
Finally, just as there is an AF-L (auto-focus-lock) button, there is also a similar AE-L (auto-exposure-lock) button, which allows you to lock the exposure settings while leaving all of the other automatic functions free to operate independently. I don't really use either of those buttons, because it's much simpler and easier to just switch to manual control.
The most important thing to remember when setting exposure is that the camera doesn't have the same amount of dynamic range as the human eye, so when there's a significant variation in light levels it's not going to be possible to capture the scene exactly as we see it. In that case we must "expose for the highlights"... which means we get the exposure of the brighter areas correct and allow the darker areas to drop off as they may. Later we can recover things in the shadows using our editor, whereas if an area "blows out" (goes white) there's no data left to recover.
Section 11: The drive dial
The drive dial selects from a number of operational scenarios.
Single-shot mode (S) is the normal choice, and is the only mode
which can trigger the flash. Other modes are as follows:
Continuous Low (C-L) and Continuous High (C-H) fire a burst of shots, at 2 selectable speeds. This is a great way to capture some interesting shots of a moving subject.
The bracketing modes (BKT1 and BKT2) will generate 3 images for every shot you take, with programmable variations in ISO speed, film type or white-balance. This can be set up in menu 5 on an X-T10, or menu 3 on an X-T20. There are 5 types of bracketing available, and 2 drive dial positions (BKT1 and BKT2) you can assign them to.
Bracketing the film speed (ISO) enables us to produce a range of exposures. To do so, the cameras's ISO setting must be high enough to allow the camera to capture the lowest "reduced ISO" version of the shot. For example, with 1 f-stop ISO bracketing the ISO speed must be set to 400. In that case the first image comes out at ISO 400, the second at 800, and the third at 200.
Bracketing the film simulations allows us to create alternate versions of a shot. Note that when using it the image in the viewfinder will always be a Provia simulation. This is rather distracting, as Provia is not a film I ever use.
Bracketing the white-balance would be useful in situations with light sources of mixed Kelvin temps, but unfortunately it only works if you're in one of the automatic W-B modes, not when the Kelvin temp is manually set... which I always do.
There are 2 other types of bracketing that are even less useful, (shutter speed and dynamic range) because they trip the shutter 3 times each (similar to "burst mode").
Next, there are several really worthless modes (ADV1 and ADV2), which create some weird special effects, and a "panorama mode", which attempts to merge a series of horizontally panned shots.
Finally, there's a "multiple exposure" mode that may have some amusing uses... and on the X-T20 a "movie mode" has been added, which quickly changes the normal photography settings to another set, intended for video. It's a nice feature if you plan to use the camera for both purposes.
In general, the only modes I ever use besides "single shot" are the continuous high speed burst and the ISO bracketing. The video mode does work well, however I don't make videos so I never actually use it.
Section 12: Basic image settings
There are 7 menu settings that have an important effect on the
overall appearance of the image, however the operator's manual
supplied by Fuji provides little useful information about them.
This section is intended to explain these functions in greater
detail. Note that the image is also affected by the Film
Simulation that you select, and the white-balance and color
shifts that you enter. (They will be discussed in the next 2
sections.)
Section 13: Film simulations
The purpose of film simulations is to enable users to capture a
particular look straight out of the camera. Each simulation has
a unique color palette, as well as exact contrast and saturation
levels, and highlight and shadow tones.
There are 6 color film simulations supplied with the camera. We should note that while these simulations offer interesting options, none of them actually produces perfectly accurate color. However Pro-Neg-Standard comes very close... so if we select it, along with the "basic image settings" previously described, and the color-shifts which will be described in the next section, we can get the colors to be technically perfect.
Kodak-style films
PRO-NEG-STANDARD: Low saturation/low contrast. Has a very accurate palette which yields ideal color and very natural skin tones, similar to portrait film. It edits very easily, and with a slight boost to saturation, it can take on a brighter Kodacolor look. This is the film I use for almost everything.
PRO-NEG-Hi: Med saturation/med contrast. This is Fuji's idea of a higher contrast and more saturated version of Pro-Neg-Standard, intended for outdoor use. Unfortunately it's a complete failure, with an ugly artificial look and really awful skin tones.
CLASSIC CHROME: Med saturation/med contrast. This film offers harder shadows and higher contrast than Pro-Neg-Standard, with muted greens and deeper blues. It has a typical vintage look, similar to Kodachrome. I sometimes use it when that sort of character is desired.
Fuji-style films
PROVIA: Med saturation/med contrast. Slightly oversaturated, with "orangy" reds. This was a general purpose film introduced by Fuji, to compete with Kodacolor. It's rather inaccurate palette never caught on with most Americans.
ASTIA: High saturation/high contrast. Astia was a brighter and warmer film produced by Fuji. It's somewhat more oversaturated than Provia... especially the yellows. It was intended to warm up casual family photos, but it's not very good for that... or much else.
VELVIA: Very high saturation and contrast. Velvia was Fuji's offering for those who wanted ultra-bright color. In normal use it looks garish and unnatural, like a bad acid trip at Disneyland. Definitely not recommended.
For those who would like to shoot in black and white there is a simulation called "Mono" (monochrome), and 3 other versions which have a yellow, red or green filter added. Using the red filter version (Mono+R) and reducing the exposure by about 1 stop produces about the best B&W image results.
On the X-T20 a new B&W simulation was added (Acros), which is a low contrast version of Mono with some grain added. It's got a rough flat look that isn't very natural or appealing.
Section 14: White-balance and color shifts
The Kelvin temp of light varies, depending on it's source.
The white-balance point is defined as the Kelvin setting on
the camera at which it renders an image with a clear daylight
look. This has a major impact on the image, however
white-balance settings are not the same thing as color
calibration settings, and should not be confused.
There are several ways that white-balance can be managed. The basic "automatic" mode simply measures the ambient light temp and sets the camera to match. This is intended to produce a clear daylight look, however it is not accurate and does not produce acceptable results. In addition, if the automatic mode is used with a flash it will lock the camera on 5900 Kelvin, regardless of the ambient light temp. This was probably intended to match the Kelvin temp of a xenon strobe, but it's not a very helpful feature.
Next we have 2 minor variations to the basic automatic mode. The "sunlight" mode is virtually identical to it, except that it doesn't lock the Kelvin temp if you use a flash. Then there is the "shade" mode, which is the same thing yet again, but simply adds a little extra warmth to the image. Unfortunately neither of these modes produces any better color accuracy than the basic automatic mode.
Next we have some other automatic modes which are intended to compensate for specific types of artificial lighting. These include one "incandescent" and 3 "fluorescent" selections. They may provide some improvement over the basic automatic mode, but still don't perform very well, and don't always properly match the many odd types of bulbs in use today. In a carefully controlled studio environment the spectrum of an artificial light source may be a significant factor, but for casual shooting it's not worth worrying about, as we can easily correct any problems later by editing.
The next 2 modes are not automatic, and therefore they have the potential to produce much better results.
The "custom" mode involves taking a photo of an 18% gray card, as seen in the ambient light. This is a very accurate method, but requires taking a new sample photo any time the lighting changes... and of course it can't anticipate the sort of light which may be added to the scene by a flash.
Finally we come to the manual "Kelvin" mode, which what I normally use. It allows me to take direct control of the camera's color temp setting to achieve a perfectly accurate image, as well as making it easy to blend in some flash if I wish.
Human vision evolved to perceive the world at the same 5600K temp and with the same flat spectrum as direct sunlight. If we simply leave the camera's Kelvin setting on 5600K we can shoot in any type of natural light, no matter how bright or overcast, and the image will always look exactly as the human eye sees it.
On the other hand, if we wish to capture the appearance of low temp lighting, we must first determine it's exact temp. To do this, we simply vary the camera's Kelvin setting while observing the results in the viewfinder. When the image has a clear daylight look, the camera is at the ambient light temp. If we set the camera above that temp the image will become warmer... so all we have to do is raise the camera's Kelvin setting above the ambient light temp until the image looks correct. This will usually require an increase of about 400-600 degrees Kelvin.
It's also necessary to know the ambient light temp if we wish to add some light from a flash, so that we can arrange for it to properly match and blend in. We do this by placing "color-correcting gels" (thin sheets of a special plastic material) on the front of the flash, to reduce it's Kelvin temp to match the ambient light.
Color shifts
There is a sub-menu called "WB-shift", which pops up after you change the white-balance mode, or change the Kelvin temp. This enables us to specify color shifts. The menu resembles a graph, with red on the horizontal axis and blue on the verticle axis.
The truth is, these color shifts really have nothing to do with white-balance and should be located in a completely separate menu. To make matters worse, these settings are lost and must be re-entered every time the Kelvin temp is changed. This is a bit of a nuisance, however these color shifts are essential for proper color calibration and cannot be omitted.
Fuji sensors are known to have a slight excess of magenta, so with the X-T10 we must enter a shift of -2 RED and -1 BLUE, while for the X-T20 we must enter a shift of -3 RED, -2 BLUE.
This makes the camera perfectly accurate, however it does not eliminate the additional magenta tint that we get from using some modern lenses, as a result of their purple multi-coating. We are not able to compensate for this using the "in-camera" color shifts, because if we go any further than the settings shown above we begin to spoil the accuracy of the other colors. Therefore we must deal with that issue later, by editing.
Section 15: Image completion
As mentioned, multi-coated lenses will create some extra
magenta tint... and there may be other lens-related issues
which have nothing to do with the camera itself. In order to
deal with such problems I created a custom "batch routine"
in my photo editor for each of my lenses, which automatically
performs all the necessary corrections.
The editor I use is PhotoScape X Pro. It handles all the basic functions very well, and costs only $40. In addition, it has no mandatory updates or subscription requirements, and can even process Fuji raw (.RAF) files.
After running the appropriate batch routine, if any of the images were taken in some type of unfamiliar artificial lighting I'll make any special corrections that might be required due to it's specific characteristics. For white balance issues I use the "temperature" slider, or you can use the white balance sampling tool and click on something white in the image. Note that it's only possible to make small changes to the white balance, so it's important to come as close as you can when taking the shot.
Another issue are the green tints sometimes caused by fluorescent lighting. To correct that kind of problem we can make a slight reduction to the green channel using the channel mixer. If you frequently shoot in the same fluorescent environment you could create a batch routine to fix all the images in one quick step... however fluorescent lights vary quite a bit, so that batch routine may only be accurate in that one particular location.
Next I might adjust an image's contrast or saturation slightly, in order to achieve a particular look, or brighten it up if it appears slightly dull or underexposed. The "gamma" slider is a good way to do this... it's similar to a brightness control, however it works primarily on the middle of the brightness range. In addition, a slight boost to "clarity" (sharpness) will enhance the appearance of images that are intended to be mostly viewed on computer monitors.
Another trick which may sometimes be helpful is to brighten or darken selected areas of the image independently. This was called "dodge and burn" in film photography. Today with digital editing we can actually adjust any parameter within a specific area of our image, simply by "masking it off", and then using the usual controls. Be careful not to over-do this, as it can quickly begin to look unnatural.
The last step is cropping. It causes no technical problems, as long as you have enough pixels remaining to properly print or display the image. I recommend that you always save a copy of the edited shot before doing the crop, so you can easily go back later and re-crop it to a different aspect ratio if necessary.
In addition, if you intend to print and frame your image, it's nice to add a border of some sort. A wide border will increase the size and cost of both the print and the frame, but it will present the image in a much more professional way, and also gives us an area to add a caption if we wish. I use the "Margin/round corners" function to create borders.
Finally, here are the Photoscape "batch routines" for the lenses I use. Once these corrections are made, the colors in the images should be almost exactly the same... only the rendering will vary, due to the unique optical properties of each lens.
Fuji XF18-55: red channel:
-6, contrast: 8, saturation: -6, gamma: 2
Fuji XF14: red channel: -1, contrast: 3, saturation: -3
Tokina: red channel: -6, lighten shadows: 15, contrast: 10, saturation: 12, temp: 6150, gamma: 5
Takumar: red channel: -1, contrast: 6, gamma: 1
Helios: contrast: 6, gamma: 1
Section 16: Lens selection
Fuji offers a variety of high quality lenses that all have
similar coatings and color characteristics. With many Fuji
lenses the camera is also programmed to apply "in-camera
corrections" to the JPG images, to compensate for the barrel
or pincushion distortion that normally occurs with zoom models,
or to reduce the perspective distortion usually found on wide
angle models. The RAW files don't contain these corrections,
so if you'de like to see the difference, simply select the
JPG+RAW "image quality" option, and compare the results.
Next, a fast and accurate auto-focus is essential for many types of photography, but not all Fuji lenses perform equally well in that regard. In general, the newer models are faster and more accurate, although a few of the older ones also still perform acceptably. Unfortunately most non-Fuji lenses that claim to auto-focus do not work well at all. Only a few Zeiss and Tokina lenses actually have properly licensed Fuji auto-focus firmware, and produce reliable results.
Please note that I use "full-frame equivalent" numbers to refer to focal lengths. That's the effective focal length, after the sensor's crop factor is included. It's a convenient way to discuss focal lengths, no matter what any camera's crop factor may be. For Fuji cameras with APS-C sensors, we must multiply the lens's focal length by 1.5 (for example a 33mm lens for APS-C sensors is equivalent to a 50mm lens on a full-frame camera).
50mm is a "1x" or "normal" view, meaning it has no magnification or de-magnification, no background compression or de-compression, and almost no perspective distortion. This makes it an easy lens to use. Anything that fits in the viewfinder will be rendered in a pleasant natural way.
Lenses with focal lengths above 50mm have positive magnification and exhibit some background compression, meaning that background objects seem larger and closer than they really are. An 85mm is a common short-telephoto focal length, often used for portraits and general close-ups. It's magnification is only 1.7x, so it's still relatively compact and easy to handle.
As focal lengths go higher, the lenses become larger and heavier and more expensive. They also require the use of tripods or very fast shutter speeds, in order to avoid camera shake.
Conversely, wide-angle lenses with focal lengths below 50mm will de-magnify objects, causing them to seem farther away than they really are. Focal lengths below 30-35mm also produce significant perspective distortion (warping or bending) towards the edges of the frame.
For those reasons, a wide-angle lens doesn't work well for most ordinary compositions. It works best if the subject is located in the center of the frame (where distortion is least) and other things are kept further away, or of some amorphous shape that's unlikely to reveal the distortion. In other cases, we can shoot with the intention of cropping off everything but the central area of the shot. This will allow us to eliminate the perspective distortion, while still retaining the full depth of field and background decompression.
Another common use for a wide angle lens is to merge a subject which is very close with something further away. It takes some practice to find opportunities for shots like this, because the scene we're going to capture in the photo won't look very much like it does in reality.
Obviously the uses for ultrawide or high-power telephoto lenses are rather limited. For most people a basic Fuji zoom lens is the best all-around choice. They can get slightly wider shots without very much perspective distortion, or zoom in enough to do some nice portraits and other close-ups.
The main thing to remember is that a zoom lens isn't just a way to save steps. Varying the focal length also affects depth of field, background decompression, and perspective distortion. We should always select a focal length based on it's aesthetic properties, then change our position as necessary to compose the shot.
Section 17: Using filters
There are 3 kinds of filters that I use; UV filters, circular
polarizers, and neutral density ("ND") filters.
People often overlook UV filters because they don't have any effect on the image, however they do provide some other handy benefits. A good UV filter has special coatings that are much easier to wipe off than those found on the lens itself... and the small physical extension that it provides makes it easier to install and operate additional filters. I always keep a good UV filter on all my lenses.
Circular polarizers are a useful type of filter I often carry when outdoors. They contain a microscopic internal matrix that allows us to block light coming from specific directions. This can be very effective for cutting reflections or glare, however there are a few major limitations. Polarizers require a hard light source, and won't do anything if light is diffused by haze or clouds. In addition, the light must be coming from specific angles to your line of sight, not directly in line with it. Finally, polarizers may cause some color shifts, and they usually reduce light by at least an f-stop or more.
Everyone should carry a good polarizer, but for all the above reasons I would only place it on my lens if I had a problem with glare... and never at any other time.
The third type of filter I sometimes use is a neutral density ("ND") filter. These filters reduce the total amount of light that enters a lens, without changing it's look or color. They are rated in f-stops, and are usually available in strengths of 3, 6 or 10.
Using a 3-stop ND filter in bright sunlight can enable you to shoot at larger apertures for more bokeh, or keep the shutter speed low enough to trigger a flash. It can also enable us to capture some interesting daytime motion-blur. A 10-stop filter produces even more dramatic results. Shutter speeds of 30 seconds are possible. Flowing water smoothes out, and objects moving in a scene become ghostly or even disappear completely. Naturally a tripod is required for this.
Remember that when using an ND filter it's always necessary to set the Kelven temp manually, as the automatic white balance can't properly measure the color of the ambient light with an ND filter in place. And although auto-exposure and auto-focus may function OK through a 3-stop filter, with a 10-stop filter there won't be enough light... so in that case, we must first manually focus the lens and set the shutter speed, then install the filter and take the shot.
One other type of filter I'll briefly mention are diffusion or mist filters. True mist contains tiny particles of moisture which reflect light and thereby demonstrate a physical presence. This comes only from genuine fog or mist, or from a fog machine. Diffusion filters do not produce good mist effects. They flatten contrast and create halation (bloom) around light sources, due to tiny reflective particles embedded in the glass. This effect is spread evenly over the entire image, and consequently it has a very obvious artificial look.
Section 18: Using flash
The pop-up flash on the camera is located so close to the body
that it will be partly obstructed by any relatively large lens.
It also lacks punch, wastes camera batteries, can't be angled or
rotated like a speedlight, and it requires using a camera menu
to adjust the power level. For all those reasons, I always use
a separate speedlight, rather than the camera's pop-up flash.
It's true that we can get a perfectly exposed shot in a dimly lit area without using a flash, by keeping the shutter open for a longer time. Naturally this would require using a tripod, and any movement within the shot would cause a blur... so if we wish to get sharp shots hand-held in low light, we must provide some additional illumination... and a small on-camera speedlight can be a convenient way to do this.
Note that to trigger a flash we are limited to a maximum shutter speed of 1/180th sec. for proper synchronization, and the drive dial must be in the single-shot mode.
The initial set-up for an on-camera speedlight depends on the situation. If we're in a bright outdoor location, and want to add some fill to a subject, dropping the shutter speed to 1/180 sec. in order to trigger the flash will bring in too much light for those conditions. To compensate, we drop the film speed as much as we can (ISO 200), and begin to stop the aperture down until the light meter reads normal (center). In overly bright conditions, or if we wish to use a larger aperture for greater bokeh, we may need to reduce the light level even further, by putting a 3-stop ND filter on the lens.
Once we have a normal reading on the light meter, we switch on the speedlight and take test shots while increasing the power, until the image brightens up as desired. This is relatively simple, because the flash is only adding a little extra light, and doesn't affect the accuracy of the exposure, as indicated by a center reading on the light meter.
Using the flash in low light is more difficult, because it must supply a greater amount of the total illumination. In order to blend it in as seemlessly as possible, we must preserve as much of the ambient light as we can. To do this, we open the aperture all the way, increase the film speed to ISO 800, and reduce the shutter speed as much as we can, while still preventing camera- shake.
If we can get a reading on the light meter of -1 or -2 f-stops with the ambient light, that's an acceptable situation. We can switch on the flash and take test-shots while increasing power until the subject brightens up as desired. On the other hand, if the light meter reads -3 or less, the amount of additional light a flash would need to supply would probably result in unbalanced lighting and glare.
Shooting with a small speedlight on a camera's hot-shoe is very convenient, and usually causes the hard shadows that the flash can create to be directly behind the subject, and therefore not obvious. In a residential setting it may be possible to tip the flash up and bounce it off the ceiling. This requires more power, but it often works well. One of the big challenges when shooting indoors with a flash is to avoid creating any nasty shadows or unwanted reflections.
Don't forget that when manually setting the shutter speed, the "Preview exposure in manual mode" function will cause the image in the viewfinder to change brightness as adjustments are made. This may cause the viewfinder to get too dark when using flash, so it may have to be disabled. This will allow the camera to display a visible image in the viewfinder regardless of how low the ambient light level may be. On an X-T10 it will be found in Set-up menu 1, Screen Set-up (set to OFF), while on an X-T20 it is in Menu 6, Screen Set-up (set to WB ONLY).
One final issue involves the color of the flash. Output from a Xenon strobe measures about 5900K, with a spectrum similar to natural light. This makes it easy to use in daytime conditions. However, when shooting in light of different Kelvin temps, we must change the temp of the flash to match, in order to make it blend in smoothly. We do this by using color-correcting gels (special sheets of plastic material that we place on the front of the flash).
First, we determine the Kelvin temp of the ambient light in the usual way, by varying the camera's Kelvin setting until we see a clear daylight look in the viewfinder. Next, we place a gel on the flash, to match it's Kelvin temp to the ambient light temp. Then we simply raise the camera's Kelvin setting above the ambient light temp to warm up the shot as necessary, knowing that the additional light from the flash will not alter the existing color of the scene.
Section 19: Printing
The most important thing about a print-shop is that they produce
reliable and accurate color prints using the type of printer and
paper we know and trust. Beyond that, the available print sizes,
shipping methods and prices all enter into the equation.
Both Kodak and Fuji have equivalent products, however I usually have my prints done on Fuji paper, with a Fuji printer.
Some of the more common types of Fuji paper are:
Note that black & white prints require special B&W chemistry. Unlike prints made with a color process, the blacks are deeper and richer, and no magenta tones can be seen when held at odd angles. Very few print shops offer this service, and it can be somewhat expensive.
These days technology has greatly changed the way we view and share photos. It's much more convenient and inexpensive to display our images on a computer than in print. In addition, the appearance of physical prints can vary, depending on the light in which they're viewed... whereas images displayed on a monitor are always consistent.
That being said, there are some print-shop products that will always be in demand, such as presentation photo-books made to commemorate an important event, or large-size prints used for wall-art.
Section 20: Photographic styles
A camera is essentially a capture device, and documentary-style
shots are it's obvious strength.
A documentary-style shot is simple and direct, with very little room for interpretation. On the other hand, shots with a certain amount of ambiguity require the viewer to use their imagination. This is one attribute that can be said to define art photography. In other words, it's intended to make the viewer think, rather than simply to show them something.
Today many images can be created using complex editing programs or AI-generated effects. While this can produce some remarkable stuff, most people do see a certain distinction between images created that way and traditional photographs. If our goal is to capture images using only our camera, there are many options... let's briefly consider a few of them.
Light-painting involves holding the shutter open in a dark area while you wave around any sort of light source you like. If you start off by firing a flash, you can combine a sharp still image with the added effects. This type of photography has unlimited potential, and really sets your imagination free.
Motion blur can also be used in some very creative ways... try panning with a moving subject while shooting at a shutter speed of about 1/40th sec. This will keep them sharp while bluring the background... or try shooting a moving subject without panning, at a speed of about 1/8 sec, to add some motion blur onto them.
Similarly, you can create some interesting abstract images by moving the camera just when the shot is taken. This is called "intentional camera movement", and the effects can easily be varied in an tremendous number of ways, including using flash to get a sharp image of a subject, and combining it with some blurred background material.
Taking double-exposures can also produce some amusing stuff. Try placing your subject on one side of the frame and merging it with something on the other side... or overlay an unusual texture onto the scene. It takes some practice to get the right exposure, since it's actually the product of two shots.
A more cerebral type of photo is what I call a "fantasy shot". It consists of a staged documentary-style scene which portrays something that doesn't actually exist. This might be humorous, whimsical, or making some sort of statement. The production of such shots often has theatrical aspects, including actors and props, costumes, etc... but it really doesn't have to be overly difficult or expensive. It just depends on the concept.
Another form of art photography can be described as primarily atmospheric. Such images are purveyors of moods and feelings, often based on relatively simple scenes... for example:
Every photo can become a magic window, if it takes us beyond the reality of our existence for a little while. If it's sufficiently captivating, we could call it art... or at least "artful" !
Section 21: Practical tips
Typical ideas about good lighting don't always apply to serious
photography. Instead lighting sometimes serves a deeper purpose,
in the way it reveals or conceals certain elements within the
scene.
Begin to notice and remember locations in your area that could be used as backgrounds in a future photo shoot. I find them by simply driving around, or by using the online satellite viewer to look for likely spots nearby.
Taking digital photos costs nothing, so when you find a worthy subject always take lots of extra shots from different angles, and any other variations you can think of. Taking a variety of photos is a good way to discover new techniques.
If you like to take photos in your home, make sure all of your light bulbs are of a similar type and temperature. Try to avoid fluorescent lights, as their spectrum is very irregular and not well-suited to photography.
The movement of an active person is an important part of the content, so try to catch them at moments which best illustrate whatever they're doing. Using "burst mode" can be very helpful for this.
Tripods can be an extremely useful piece of gear, but they're heavy and not always needed, so rather than carry it back and forth each time I go out, I keep an extra one in my car.
Don't always shoot at eye level. Changing the camera's height or lens angle has a major impact on the character of an image. Try using the tip-out screen to shoot while holding the camera below your waist or above your head.
Because our vision is stereoscopic we don't see things from a single point, as the camera does. This becomes very noticeable at close distances. A simple trick to overcome this is to just close one eye, to better visualize how the camera will render the scene.
Try to "layer" your compositions by including some foreground material, to create a feeling of depth and give the viewer a sense of the location. Shooting through a door or window frame, or the gaps between buildings or trees, will produce a similar effect.
If you happen to get an outdoor shot of something you think is interesting, try returning at a different time of day, when the position of the sun can make it look even better. The angle of the sun can really make a tremendous difference.
Whatever is in focus will eventually attract the attention of the viewer, even if it's not in the center of the image. The selection of an unusual focus point is therefore an effective way to make a shot a little more interesting.
Bringing a sunburst into a shot can give it a magical quality. Using higher apertures will produce a sharper definition.
Pay special attention to specular highlights ("catch lights"), as these small reflections can provide important visual clues about the shape of 3-dimensional objects.
Cropping will probably be necessary later, so when composing a shot it's wise to leave a little extra space around the edges.
Finally, don't overlook black and white as a medium. Color can be distracting, while black and white tends to better emphasize the content. It can also create a dated or nostalgic look, that seems very appropriate for shots of antiques and old items.
Section 22: The Godox X1T flash trigger
Many Godox flash units have a built-in wireless receiver, which
allows them to be adjusted or triggered remotely, using a Godox
X1T transmitter. It mounts on the "hot shoe" of the camera, and
uses two AA rechargable NiMH batteries.
To begin, it's necessary to select a radio channel for the X1T. To do this, just press CH/OK, and turn the dial to the desired channel (I use ch 1), then press CH/OK again to save. Don't forget to also set the flash units to the same channel.
Next, the X1T has 3 "group identification letters" (A, B, or C) to allow us to control up to 3 flash units separately. We simply assign one of those group identification letters to each of the flash units, when we set them.
Set-up:
Hold top CH/OK button to enter the set-up
menu.
Turn dial to scroll through functions
Fn 0-12. (see Recommended Settings below)
Press the middle GR button to select a
function.
Turn dial to specify desired option.
Press the middle GR button again, to save
the setting.
Press bottom MODE button to exit set-up
menu.
Recommended settings:
0. Sync delay: 00 (no delay)
1. Single contact mode: off (used
w/cables)
2. Zoom: off (function unknown)
3. PC socket assign: ou (PC socket
triggers flash)
4. Multi-flash: off (single flash
only)
5. Minimum power: 1/128
6. AF assist: off
7. Number of groups: 3 (or 5, if
needed)
8. Beep: off (silent operation)
9. Always xmit settings: on
10. APP mode: off (xfers control to
an iPhone)
11. Specific camera: 00 (for most
Fuji cameras)
12. Unlisted function: 00 (function
unknown)
Operation:
Use dial to move a group into center position on display.
Press bottom MODE button to cycle through TTL, Manual or OFF for that group.
Press middle GR button then use dial to adjust power for that group. Press GR again to save.
To set channel press top CH/OK button and turn dial, then press CH/OK again to save.
Double-click top CH/OK button to turn the modeling lamp on or off, if the light has one.
Press top TEST button to fire all active flashes.
Section 23: The Godox TT350 speedlight
This mini-speedlight is perfect for mounting directly on-camera,
due to it's small size and weight, and fully-articulating head.
This flash is powered by only 2 AA cells, so it's rather fussy about the type of batteries you can use. It won't run properly on rechargable AA batteries, which usually have about 1.3 volts, but it runs fine on fresh alkaline cells, which have 1.6 volts.
In addition, although the unit can be triggered by an X1T remote, it sometimes fails to fire. However it always fires fine, when mounted directly on the camera. If you can live with these problems, this unit provides a major upgrade over the camera's pop-up flash.
Note that when used to provide most or all of the illumination, the Kelvin temp and color shifts for this speedlight are 5900K, +1 Red, -4 Blue.
Set-up:
Hold the 2nd from left ZOOM button,
to enter the set-up menu. (see Recommended Settings
below)
Use the dial to scroll through 5 functions.
Use the dial and central SET button to change a
setting.
The menu will save and exit automatically,
after 5 seconds.
Recommended settings:
1. St: off (sleep timer)
2. AF: off (focus assist)
3. bL: on (backlight)
4. AP:on (zoom format = APS)
5. Id:off (wireless ID)
Operation:
Press the 1st button (MODE) to toggle between Manual, Multi
and TTL flash modes (select Manual).
In Manual mode the dial adjusts the flash power.
Holding the 3rd (SYNC) button enters the wireless menu. Use the dial to cycle through OFF (no icon), M (master), and S (slave). After setting to S (slave), press the 4th (GR/CH) button and set the group to group C, then press and hold the GR/CH button again and set the channel to channel 1.
Press the 2nd (ZOOM) button to adjust the beam width, from 16-69. Setting 16 is broad and well-diffused, and is what I normally always use. The pattern gets more concentrated at higher settings, and becomes harsh and irregular by 33.
Note that if the pull-out modifier is extended, the zoom drops to 12 and cannot be adjusted. The pattern is much the same as at 16, but the light output is reduced by about 50%. This is handy when you need to drop the output lower than the power setting will allow (1/128 is the minimum).
Pressing the 3rd button toggles high-speed sync on/off (not used). There is also an optical slave mode if needed. In the Manual (non-wireless) mode, press GR/CH and select S1.
Section 24: The Godox TT600 speedlight
This speedlight is too heavy for mounting directly on a camera,
but it can be placed somewhere else, and triggered with the X1T
remote. It runs on 4 AA rechargable batteries, which last quite
a while.
When mounted in an S-bracket this flash can be used with any type of modifier. I often use it in the studio with a simple 7" dish, as a backlight or to provide some fill. Because it's battery powered it's very easy to move around, and it can be set to very low power levels, to provide whatever sort of subtle accent lighting that may be desired.
Note that when used to provide most or all of the illumination, the Kelvin temp and color shifts for this speedlight are 5900K, +1 Red, -3 Blue.
Set-up:
Hold the 2nd (ZOOM) button to enter the
set-up menu. (see Recommended Settings below)
Use the SET button to scroll through 5
functions.
Use the dial to change a setting if desired.
The menu will save and exit automatically,
after 5 seconds.
Recommended settings:
1. SL: off (sleep time)
2. FC: 10 sec. (focus assist
duration)
3. bP: off (buzzer)
4. bL: on (backlight)
5. OS: off (or S1) (optical
slave mode)
Operation:
Press the 1st button (MODE) to toggle between Manual and Multi
flash modes (select Manual).
In Manual mode the dial adjusts the flash power.
Holding the 1st (MODE) button enters the wireless menu. Use the dial to cycle through OFF (no icon), M (master), and S (slave). After setting to S (slave), press the lower GR/CH button to set to group B, or press and hold GR/CH then use the dial to set to channel 1.
Press the 2nd (ZOOM) button to adjust the beam width, from 20-200. Setting 20 is broad and well-diffused, and is what I normally always use. The pattern gets more concentrated at higher settings, and becomes harsh and irregular by 50.
Press 3rd button to toggle high-speed sync and focus assist on/off (not used).
Section 25: The Promaster 100SL speedlight
This is an inexpensive medium-size speedlight which doesn't have
wireless capability, however, it can be "optically triggered" by
firing another flash in the area. It can run on 4 AA rechargable
batteries. These flashes are handy for extra backlights or accent
lights, etc.
Set-up:
Hold lower-center button to enter the set-up
menu. (see Recommended Settings below)
Use the lower-left button to scroll through
9 functions.
Use the lower-right button to specify a new
setting.
Use the lower-center button to save the new
setting.
Hold lower-center button to exit set-up menu.
Recommended settings:
1. Sound: off (disable beeping)
2. LCD backlight: on (keep display
illuminated)
3. Focus display: PUL (show flash
head position)
4. Standby: off (disable sleep
mode)
5. Standby (slave): 60 min. (set
max. sleep mode delay)
6. Temp: on (enable thermal
protection)
7. Contrast: mid (function
unknown)
8. Reset: no (use if required)
9. n/a (shows firmware version)
Operation:
Press the 1st button (MODE) to toggle between Manual, Multi
and TTL flash modes (always use Manual).
The lower-left and right buttons adjust power in Manual and optical slave mode.
Hold the MODE button to enter optical slave mode (F1).
Press the 3rd (LED) button to toggle CA (catchlights) and AF (auto-focus assist) functions on/off (not used).
Hold the 3rd (LED) button to switch the video light on/off.
Section 26: The Godox SK300 studio flash
This is a versatile AC-powered unit, which produces excellent
results with almost any type of diffuser. It is most often used
with a softbox, and can be remotely controlled using the X1T.
There are no menus, as each function has it's own dedicated
controls.
Note that when used to provide most or all of the illumination, the Kelvin temp and color shifts for this speedlight are 5900K, -2 Red, -1 Blue.
Set-up and Operation:
Turning the knob changes the power level, although this is
normally done with the remote.
Press the 1st button (GR/CH), to set the Group to "A", by using the knob. Press the knob to enter the setting.
Press and hold the same button and set the Channel to "1", using the knob as before.
To activate or de-activate the wireless control system press buttons 1 and 2 together (look for Antenna icon).
Press the 2nd (S1/S2) button to rotate through 3 settings, which concern the slave trigger mode. We want it shut off, (no S1 or S2 icon is displayed).
The 3rd button controls a "ready beeper", which I turn off. The flash recharges instantly, so there's no need for it.
The 4th button controls the modeling lamp, which can be used to help aim a spotlight... however it should only be used for brief periods, due to the high heat that it generates.
Pressing the button cycles through 3 modes (Off, PROP and %). In the PROP mode the intensity is proportional to the setting of the flash, which is not very useful. In the "%" mode you can set the power yourself. You must press the knob once to begin, then turn it to make the adjustment, then press it again to enter the new setting. I always set it to 5%, which is more than adequate, and keeps the bulb as cool as possible.
Section 27: The Godox SL60 studio LED lamp
This unit comes with an older type wireless remote, which isn't
compatible with the X1T system. However I've never needed it, as
I only use this unit with a small softbox for product photos, or
as a modeling lamp while doing flash shots.
Operation couldn't be easier... simply switch on the light and adjust the power as desired. I typically set it to 15-25%.
That being said, some precautions are required. Never operate a continuous light without a modifier, or look directly into it... they can be extremely strong and blinding, even at their lowest power setting.
Note that when used to provide most or all of the illumination, the Kelvin temp and color shifts for this continuous LED lamp are 6300K, -5 Red, +2 Blue.
Section 28: The Hahnel Captur shutter release
This system consists of a receiver, which must be plugged into
the "mic/remote" jack on the camera... and a transmitter which
allows you to trigger the shutter remotely. These units run on
two AA rechargable batteries (each).
The function of the shared "mic/remote" jack is selected using camera menu 4, Movie Setup, on the X-T10... or in menu 5 on the X-T20. Note that in order for a change to take effect you must turn the power off, then back on again.
If necessary to re-synchronize the transmitter and receiver:
1. Begin with both units turned off.
2. Hold down button and turn on transmitter.
3. Wait for steady red light.
4. Release button.
5. Hold down button and turn on receiver.
6. Wait for steady red light.
7. Release button.
8. Turn both units off.
* * * N O T E S
* * *
Studio set-up #1 (standard portraits)
MODELING MARK: 28" from center of backdrop
LENS MARK: 80" from center of backdrop
BACKDROP COLOR: something that compliments the model...
avoid white, gray or black
CAMERA: X-T20
tripod mounted, in vertical orientation
lens location: at lens mark
lens height: 56" (or A/R for
height of model)
focus box: +3 above center
film: Pro-Neg-Standard
film speed: 250
white balance: 5900K and color shift -2 Red,
-1 Blue (to match key light)
shutter speed: 1/180 sec.
lens: Fuji XF18-55 @ 43mm (65mm
equiv)
aperture: f/9
KEY LIGHT: Godox SK300
modifier: 24" softbox
angle: 15 deg down
location: 22" to side of lens mark and 5"
forward (can place on either side by swapping w/modeling
lamp)
stand height: 75"
power: 1/8
MODELING LAMP: Godox SL60
modifier: 24" softbox
angle: 15 deg down
location: 22" to side of lens mark and 5"
forward (place opposite key light)
stand height: 75"
power: 25%
REFLECTOR: round, 29" dia. (color silver)
angle: hang vertical, perpendicular to
backdrop
location: 22" to side of modeling mark and 24"
from backdrop (place opposite key light)
height (to center): approx "head level" of
model
EDITING REQUIRED:
red channel: -3, contrast: 3,
saturation: 3
crop as desired